
DURATION
7 Months
ROLE
Researcher,
Design Lead
SCOPE
Ideation, Research, Prototyping, Testing
OVERVIEW
This project addresses the rising challenges of digital distractions, task avoidance, and lack of focus faced by university students and knowledge workers as we become more reliant on digital ecosystems.

Product Description
Ambition Lock transforms your phone into a powerful productivity companion, removing distractions, supporting your goals and keeping you motivated.


Prototyping
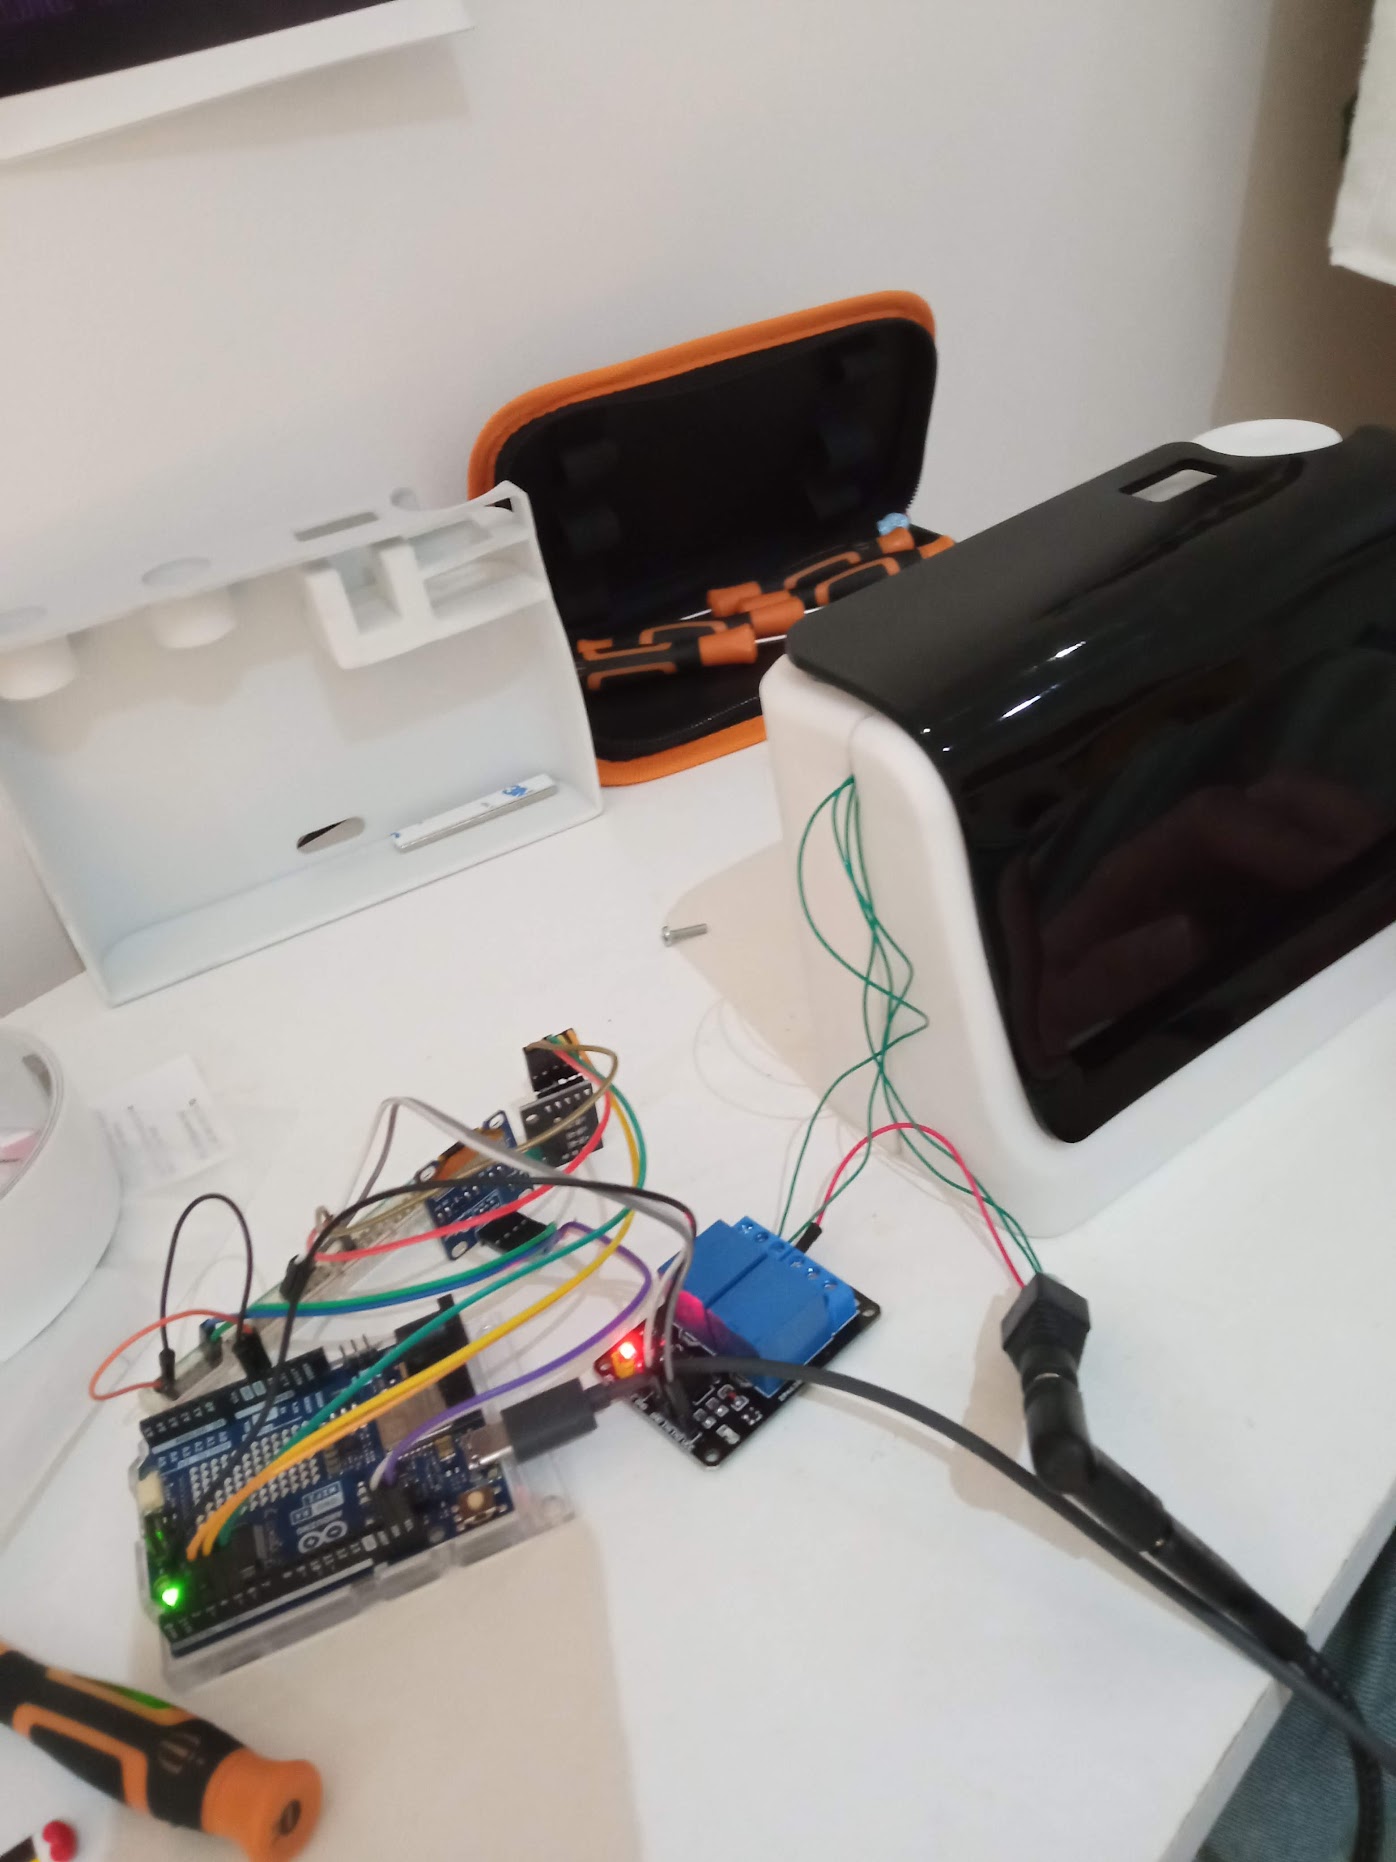
Following the foundational research from the project proposal, I designed and built a 3D printed functional prototype that physically locks your phone away using electromagnets and allows you to control a minimalist interface with a dedicated dial.
The process was iterative, involving ideation, concept development, various prototyping methods and usability testing to create a solution that mitigates digital distractions for university students, guided by the principles of responsible, adaptive design.

To inform the design of the physical prototype, I conducted visual research on platforms like Pinterest and Behance, focusing on inspiration from modern industrial design. I put together various moodboards, which helped define the project's visual direction.
The examples directly influenced key decisions regarding material selection, the final product form, and specific details developed in the CAD model. Throughout the design process, this moodboard served as a constant reference point, providing encouragement whenever I felt stuck creatively.
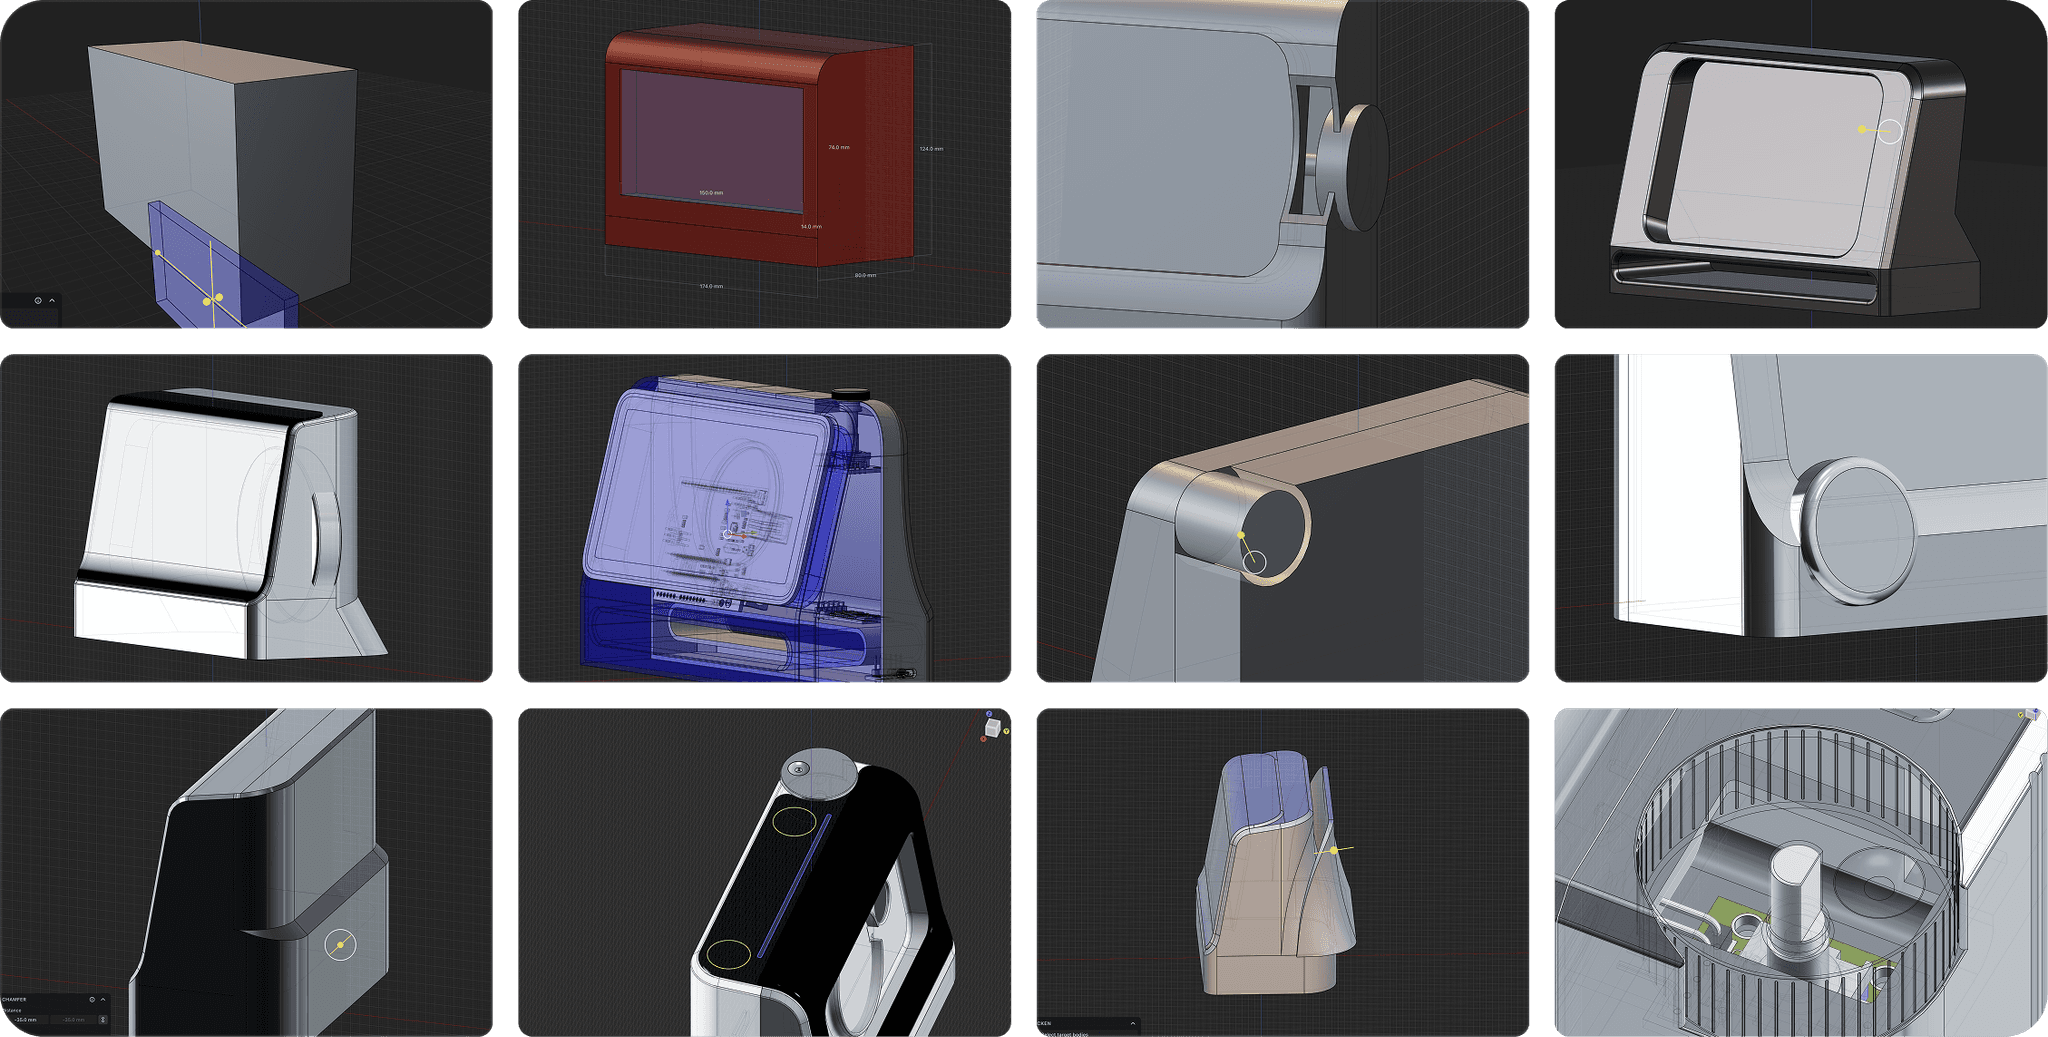
The CAD modelling process took the most amount of time. This was my first industrial design project so therefore having design meet specific manufacturing requirements such as electronic components took meticulous planning and accurate measuring using a digital calliper.
I went through a long series of iterations until I arrived at the final outcome. I had to account for shrinkage during the 3D printing process due to changes in room temperature by experimenting with different tolerances for fittings such as screw holes, sockets for the magnets and the cutout for the control dial.
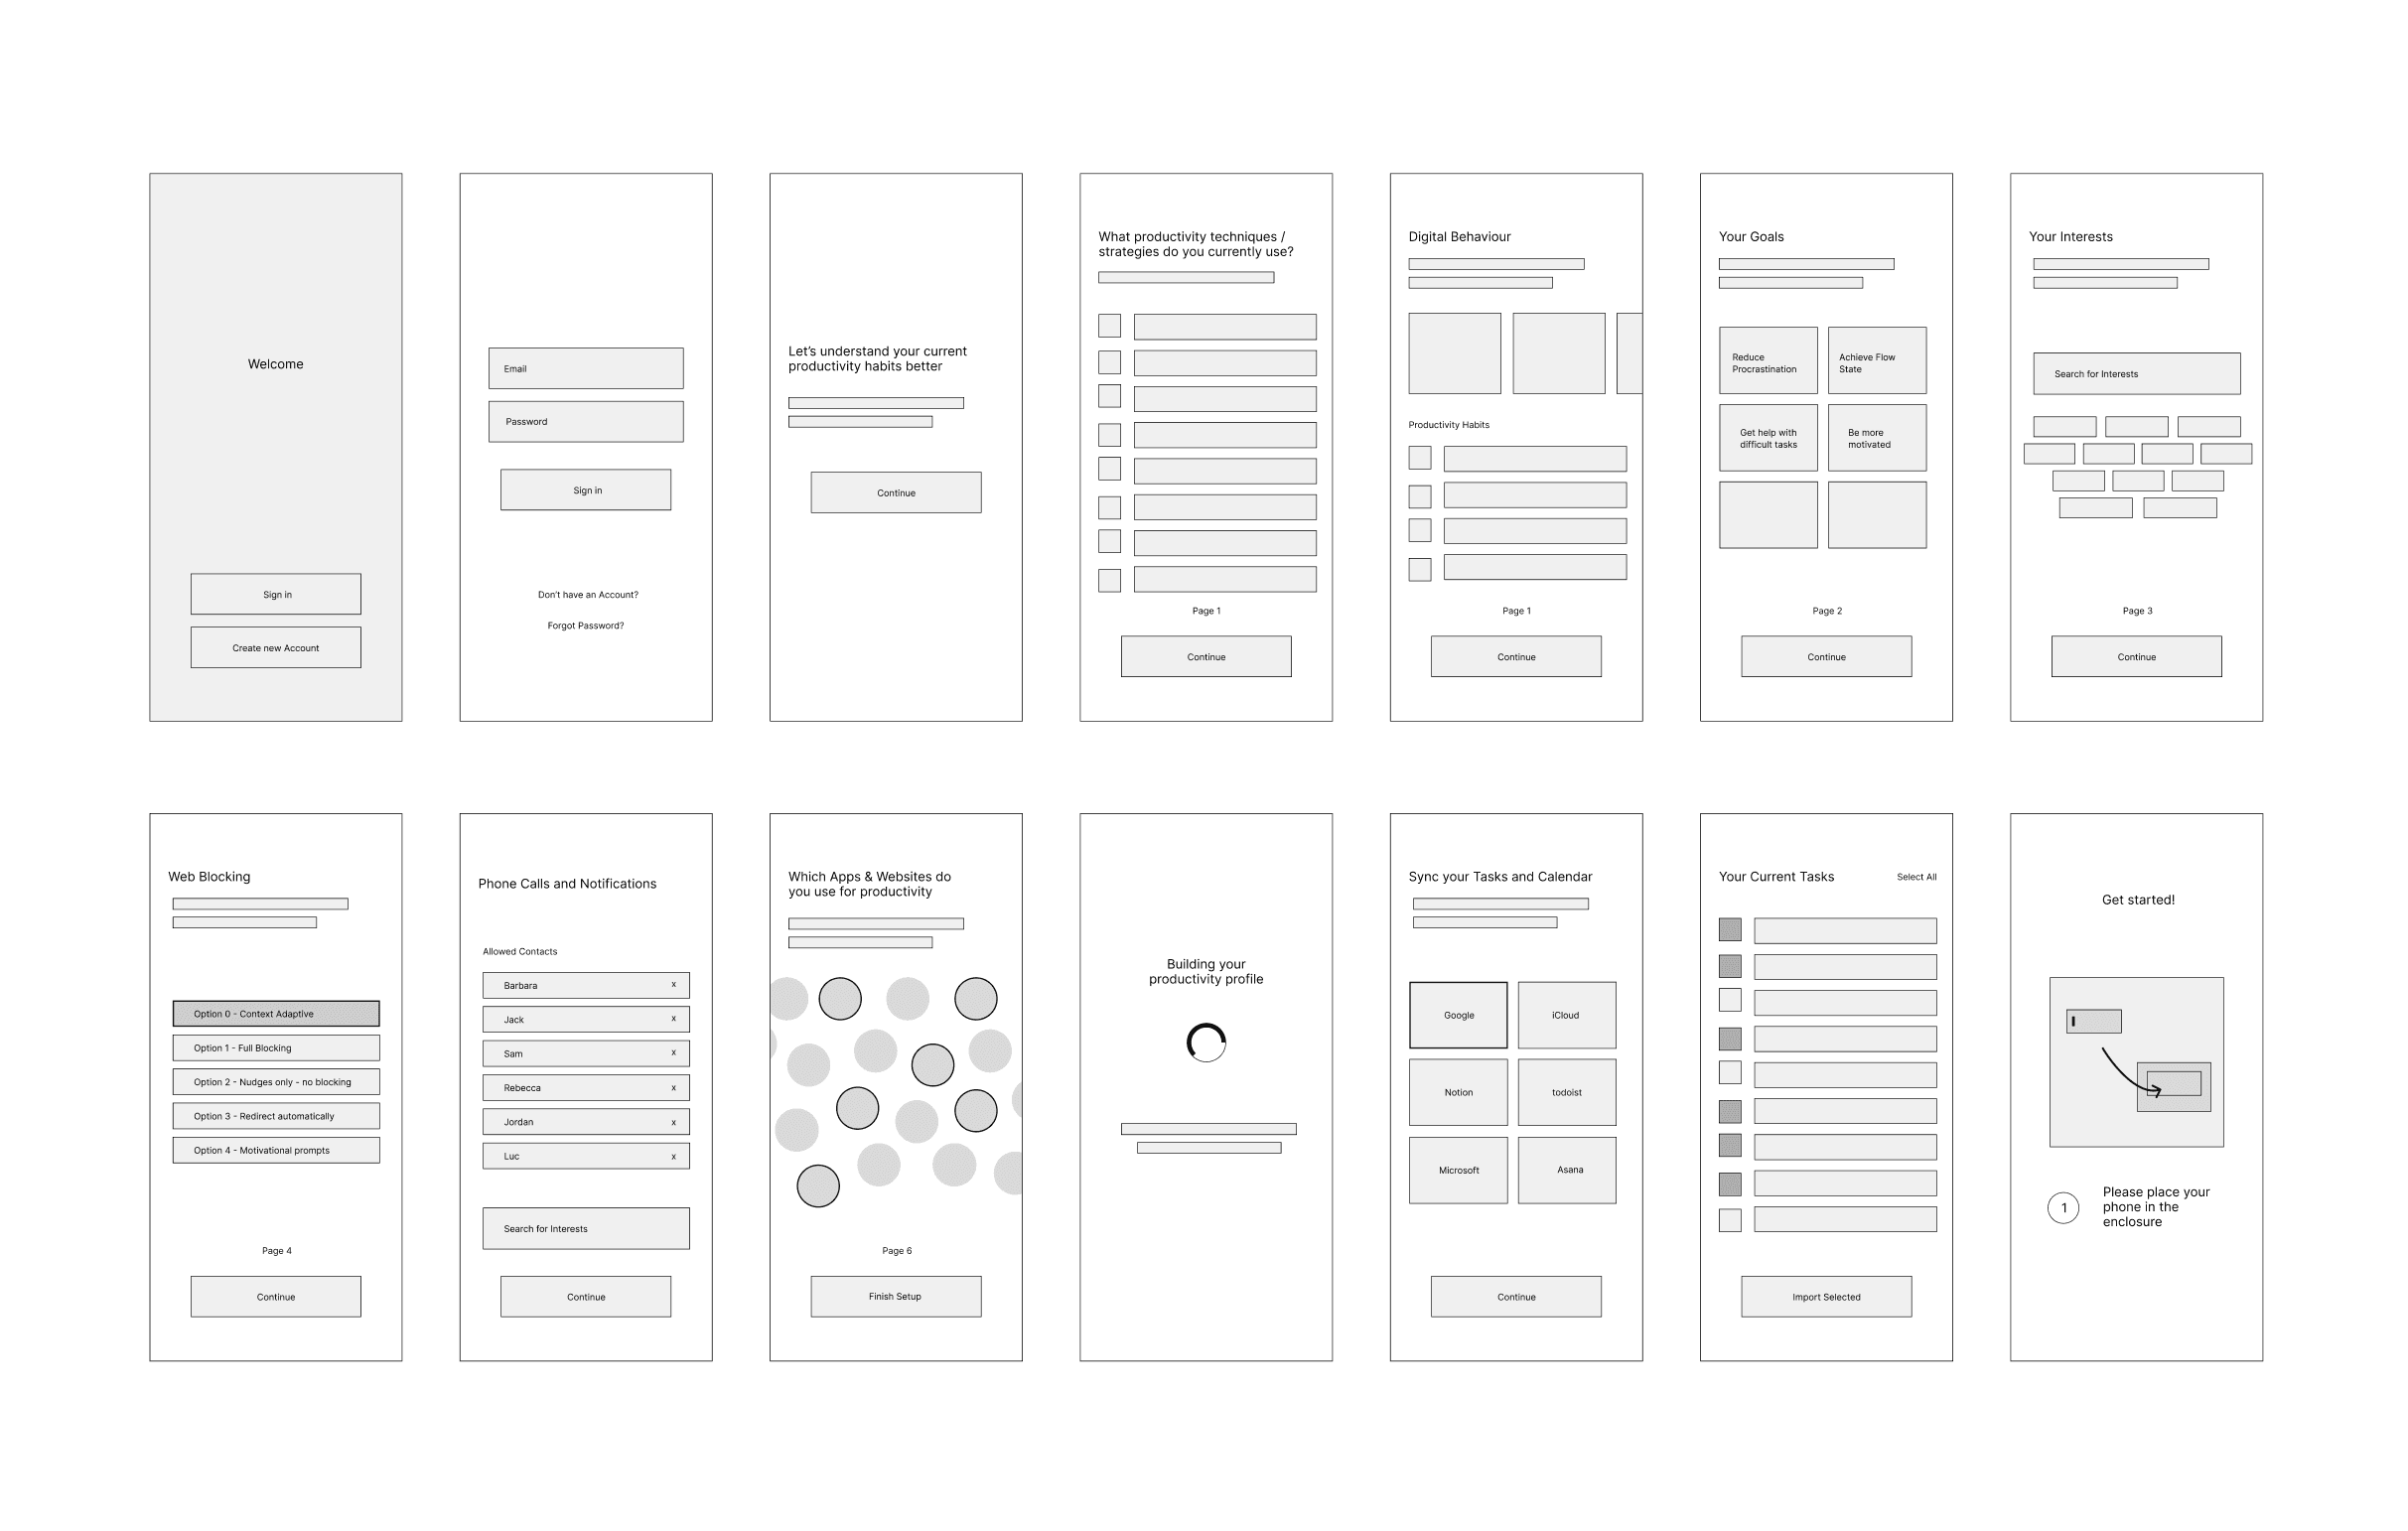
Wireframing
I created a set of wireframes for the digital app alongside the physical product to help me ideate and prototype in order to understand the different user flows better and which features to prioritise. I went through many iterations to structure the core functionality intuitively.
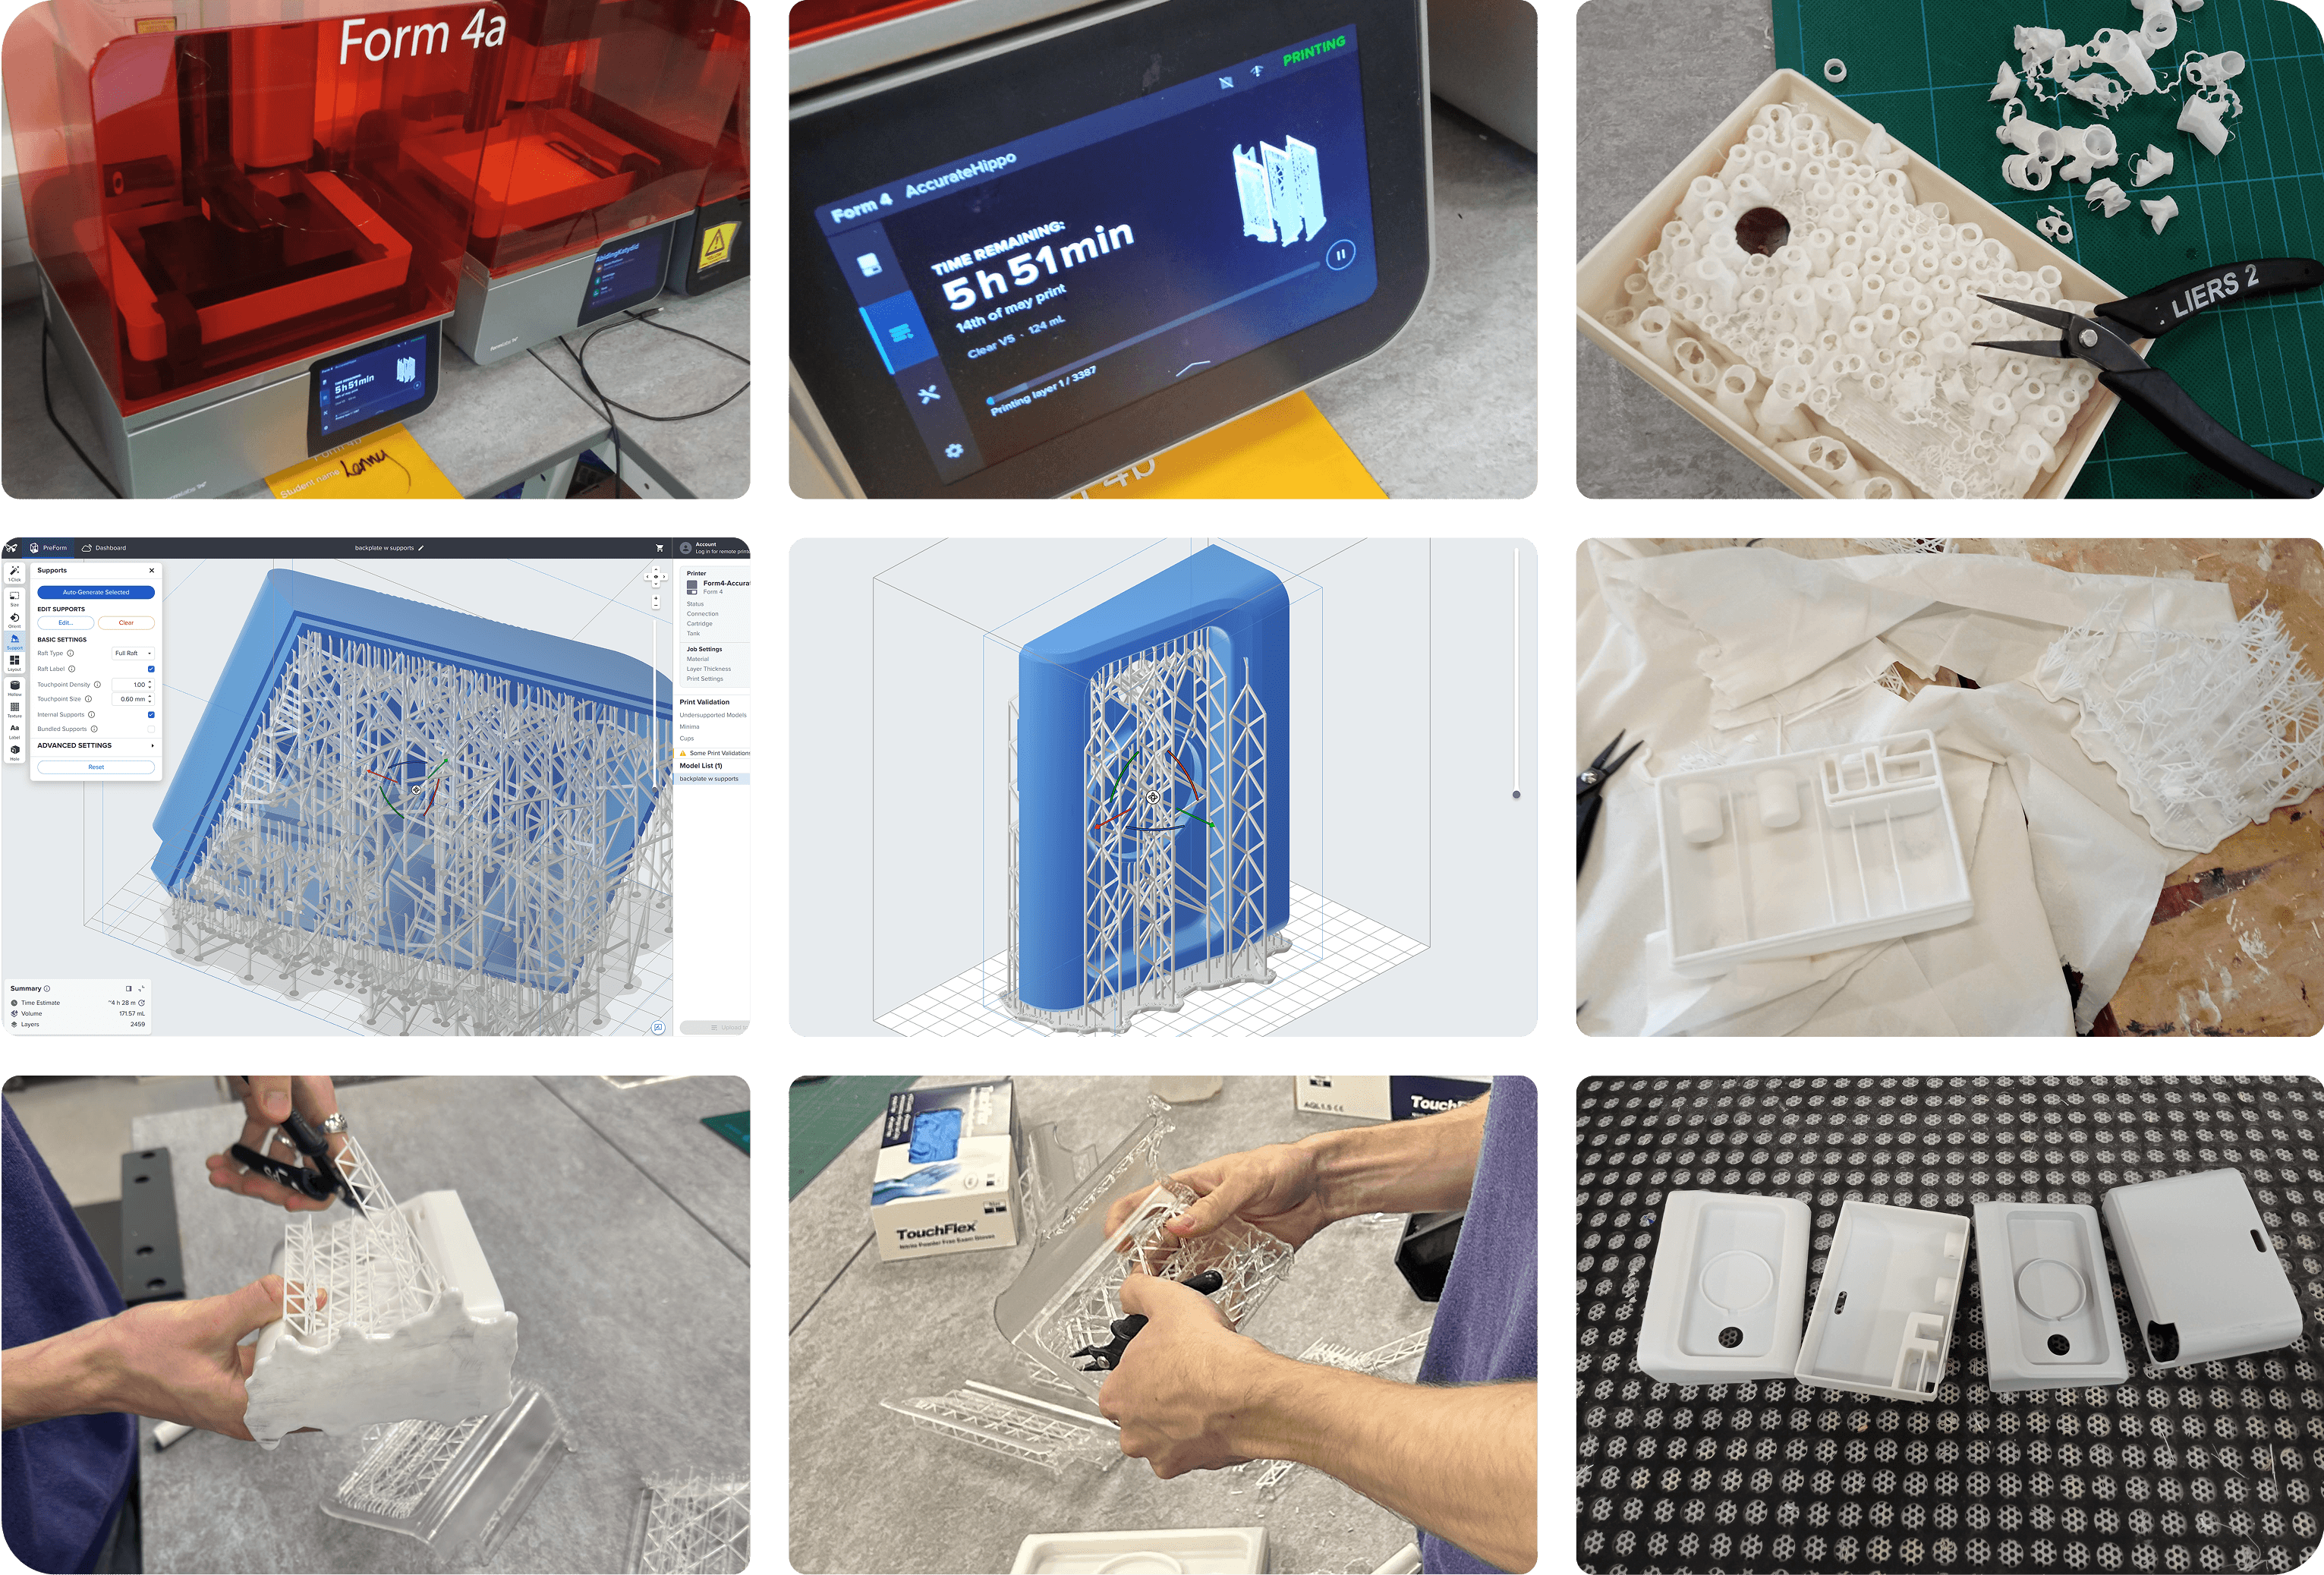
3D Printing
After I finally finished CAD modelling I was ready to start 3D printing. Hannah the technician in the 3D workshop was kind enough to explain how to use the slicer software to generate supports for my parts and helped me throughout the two month process immensely to reach the desired precision and quality for the final prototype.

